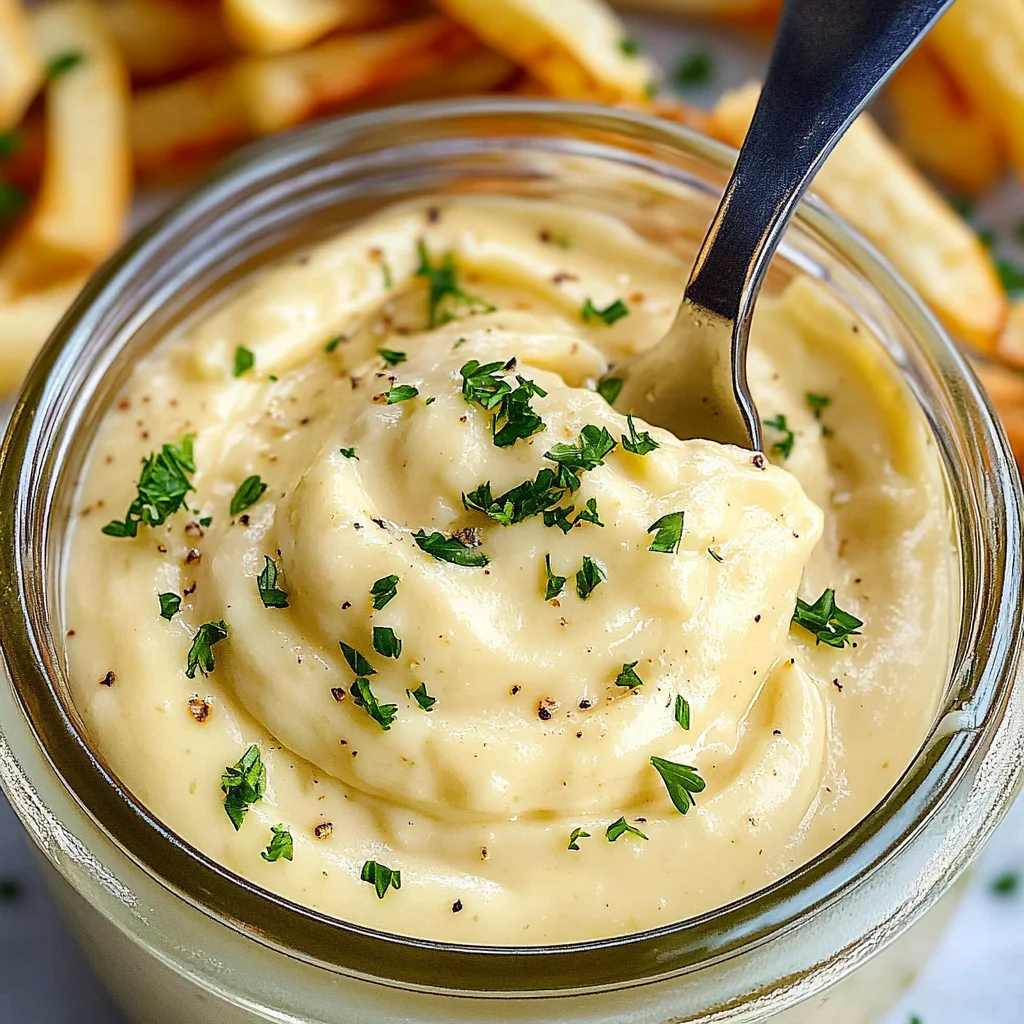
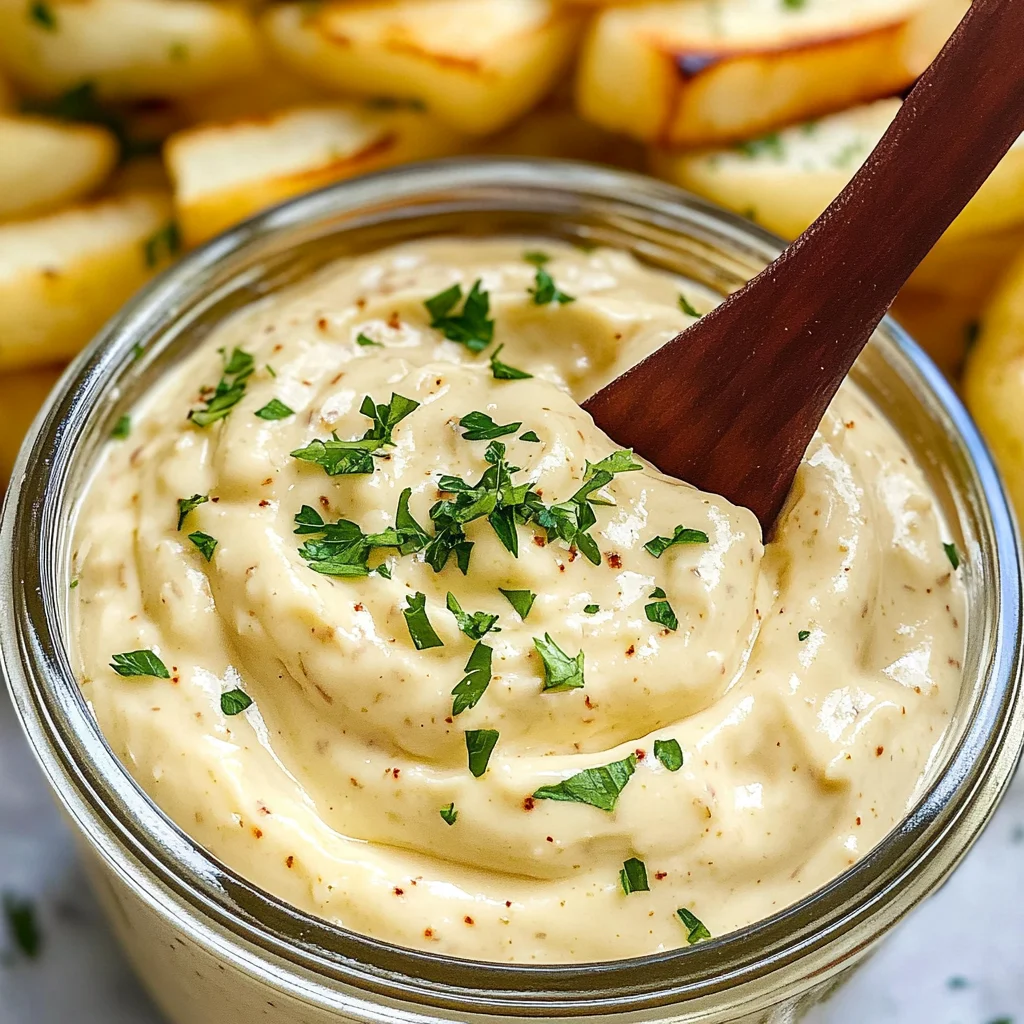
This Roasted Garlic Aioli recipe is a creamy and flavorful sauce that’s a breeze to whip up. Perfect for various occasions, its rich blend of sweet roasted garlic, tangy lemon juice, and a hint of Dijon mustard elevates any dish. Use it for dipping fries, spreading on sandwiches, or as a gourmet touch to grilled meats. The standout quality of this aioli lies in its simplicity and depth of flavor.
Why You’ll Love This Recipe
- Easy to Make: With minimal ingredients and straightforward steps, anyone can create this delicious aioli.
- Flavor Explosion: The combination of roasted garlic and tangy lemon makes every bite burst with flavor.
- Versatile Use: Perfect as a dip, spread, or sauce for various dishes, enhancing your meals effortlessly.
- Gourmet Touch: Impress your guests with this homemade sauce that tastes fancy but is incredibly easy to prepare.
- Quick Prep Time: Your kitchen will be filled with mouthwatering aromas in just 45 minutes from start to finish.
Tools and Preparation
Having the right tools makes creating your Roasted Garlic Aioli even easier. Here’s what you’ll need:
Essential Tools and Equipment
- Roasting pan
- Aluminum foil
- Mixing bowl
- Fork
- Knife
Importance of Each Tool
- Roasting pan: Ensures even cooking while roasting the garlic, allowing flavors to develop beautifully.
- Aluminum foil: Keeps the garlic bulb moist during roasting, resulting in perfectly soft cloves ready for mashing.
- Mixing bowl: Provides ample space to combine ingredients without mess, making the mixing process smooth.
- Fork: Ideal for mashing the roasted garlic into a creamy consistency effortlessly.
Ingredients
For the Roasted Garlic Aioli
- 1 head garlic
- 1 tablespoon olive oil
- ½ cup mayonnaise
- 1 tablespoon lemon juice
- ½ teaspoon Dijon mustard
- salt and pepper (to taste)
- parsley or chives (chopped, for garnish)
How to Make Roasted Garlic Aioli
Step 1: Preheat the Oven
Preheat your oven to 400°F (200°C).
Step 2: Prepare the Garlic
- Peel away the outer layers of the garlic bulb, leaving the cloves intact.
- Using a sharp knife, slice off the top of the bulb to expose the cloves.
- Place the garlic bulb on a piece of aluminum foil. Drizzle the exposed cloves with olive oil, then wrap the bulb tightly in the foil.
Step 3: Roast the Garlic
Roast the garlic in the preheated oven for 30-40 minutes or until the cloves are soft and golden brown.
Step 4: Cool and Squeeze
Once roasted, remove the garlic from the oven and let it cool slightly. Squeeze the roasted cloves out of their skins into a small bowl.
Step 5: Mash Garlic Cloves
Mash the roasted garlic cloves with a fork until smooth and creamy.
Step 6: Combine Ingredients
In a separate bowl, combine the mashed roasted garlic, mayonnaise, lemon juice, and Dijon mustard. Stir until well blended. Season with salt and pepper to taste. Adjust seasoning as needed.
Step 7: Garnish
If desired, garnish your aioli with chopped fresh herbs such as parsley or chives for added flavor and color.
Step 8: Chill Before Serving
Transfer your aioli to a serving dish or airtight container. Cover and refrigerate for at least 30 minutes to allow flavors to meld together.
How to Serve Roasted Garlic Aioli
Roasted Garlic Aioli is a versatile condiment that elevates any meal. Whether used as a dip or a spread, it enhances flavors and adds a gourmet twist. Here are some delicious ways to serve this creamy sauce.
As a Dip
- Fresh Vegetables: Serve with crisp carrots, celery, and bell peppers for a healthy snack.
- Potato Chips: Pair with crunchy chips for an irresistible treat at gatherings.
- Breadsticks: Use aioli as a dip for warm, freshly baked breadsticks.
On Sandwiches
- Turkey Sandwich: Spread on turkey sandwiches for added flavor and creaminess.
- Veggie Wraps: Enhance your veggie wraps with a layer of roasted garlic aioli.
With Seafood
- Grilled Shrimp: Drizzle over grilled shrimp for a delightful seafood dish.
- Fish Tacos: Use as a topping for fish tacos to add richness.
As a Salad Dressing
- Green Salad: Thin out the aioli with lemon juice to create a tasty dressing.
- Potato Salad: Mix into potato salad for an extra layer of flavor.
How to Perfect Roasted Garlic Aioli
Creating the perfect Roasted Garlic Aioli requires attention to detail. Follow these tips to ensure your aioli stands out.
- Choose Fresh Garlic: Fresh garlic offers the best flavor. Avoid older bulbs that may be sprouting or soft.
- Adjust Consistency: If you prefer a thinner aioli, mix in more lemon juice or olive oil until desired thickness is achieved.
- Let It Rest: For the best taste, refrigerate the aioli for at least 30 minutes before serving. This allows flavors to meld.
- Experiment with Flavors: Add spices like smoked paprika or cayenne pepper for an exciting twist on the classic recipe.
- Use High-Quality Mayonnaise: The base of your aioli makes a difference; choose a mayonnaise that you enjoy on its own.
- Season Gradually: Taste as you go when adding salt and pepper to find your perfect balance.
Best Side Dishes for Roasted Garlic Aioli
Roasted Garlic Aioli pairs wonderfully with many side dishes. Whether you’re hosting a party or enjoying a family dinner, consider these options:
- Crispy French Fries: Golden-brown fries are perfect for dipping into creamy aioli.
- Grilled Asparagus: Charred asparagus pairs beautifully with the rich flavors of garlic aioli.
- Roasted Potatoes: Seasoned roasted potatoes become even more delicious when dipped in this sauce.
- Zucchini Fritters: These crispy fritters are elevated by the addition of roasted garlic aioli on the side.
- Caprese Salad: Fresh mozzarella and tomatoes complement the creamy texture of garlic aioli perfectly.
- Stuffed Mushrooms: Savory stuffed mushrooms provide an excellent contrast when served with roasted garlic aioli.
- Corn on the Cob: Slathering corn with aioli adds creaminess to this summertime favorite.
- Sweet Potato Wedges: The sweetness of roasted sweet potatoes balances well with the garlicky richness of aioli.
Common Mistakes to Avoid
When making Roasted Garlic Aioli, it’s easy to overlook a few key steps that can affect the final result. Here are some common mistakes to watch out for.
- Using raw garlic: Raw garlic has a strong and overpowering flavor. Always roast the garlic first to achieve a sweet, mellow taste.
- Not properly mashing the garlic: If you don’t mash the roasted garlic well, it can lead to a lumpy aioli. Ensure you mash it until smooth for the best texture.
- Skipping the chilling step: Allowing the aioli to chill helps the flavors meld together. Skipping this step can result in a less flavorful sauce.
- Overseasoning with salt: It’s easy to add too much salt. Start with a small amount and adjust gradually, tasting as you go.
- Using low-quality mayonnaise: The base of your aioli is mayonnaise, so using a high-quality brand will enhance the overall flavor.
Storage & Reheating Instructions
Refrigerator Storage
- Store Roasted Garlic Aioli in an airtight container in the refrigerator.
- It will last for up to 1 week when stored correctly.
Freezing Roasted Garlic Aioli
- You can freeze Roasted Garlic Aioli for up to 3 months.
- Use freezer-safe containers or ice cube trays for easy portioning.
Reheating Roasted Garlic Aioli
- Oven: Preheat your oven to a low temperature (about 300°F). Place the aioli in an oven-safe dish and heat until warmed through.
- Microwave: Microwave on low power in short intervals, stirring between each session until warm.
- Stovetop: Heat gently over low heat in a saucepan, stirring continuously to prevent separation.
Frequently Asked Questions
If you have questions about making Roasted Garlic Aioli, here are some common inquiries and their answers.
Can I use raw garlic instead of roasted garlic in Roasted Garlic Aioli?
Using raw garlic will give your aioli a sharper taste. It’s recommended to roast the garlic for a sweeter flavor profile.
How long does Roasted Garlic Aioli last in the fridge?
Roasted Garlic Aioli can be stored in an airtight container in the refrigerator for up to one week.
Can I customize my Roasted Garlic Aioli?
Absolutely! You can add herbs like basil or dill, or spices like paprika or cayenne for different flavors.
What dishes pair well with Roasted Garlic Aioli?
This versatile sauce pairs wonderfully with vegetables, seafood, sandwiches, and even grilled meats.
Is Roasted Garlic Aioli gluten-free?
Yes, Roasted Garlic Aioli is gluten-free as long as you use gluten-free mayonnaise. Always check labels if you’re sensitive.
Final Thoughts
Roasted Garlic Aioli is not only delicious but also incredibly versatile. This creamy sauce enhances everything from fries to sandwiches and can easily be customized with various herbs and spices. Give this recipe a try; you’ll find it’s a fantastic addition to your culinary repertoire!

Roasted Garlic Aioli
- Total Time: 55 minutes
- Yield: About 8 servings 1x
Description
Roasted Garlic Aioli is a delectable, creamy sauce that transforms everyday dishes into gourmet experiences. This recipe combines the sweetness of roasted garlic with the zesty brightness of lemon juice and a touch of Dijon mustard, creating a rich flavor profile that’s perfect for dipping, spreading, or drizzling on grilled meats. With just a few simple ingredients and minimal prep time, you can elevate your meals effortlessly. Whether served alongside crispy fries or as a luxurious spread on sandwiches, this homemade aioli will impress your family and guests alike.
Ingredients
- 1 head garlic
- 1 tablespoon olive oil
- ½ cup mayonnaise
- 1 tablespoon lemon juice
- ½ teaspoon Dijon mustard
- Salt and pepper (to taste)
- Chopped parsley or chives (for garnish)
Instructions
- Preheat your oven to 400°F (200°C).
- Peel the outer layers of the garlic bulb, leaving the cloves intact. Slice off the top to expose the cloves.
- Drizzle exposed cloves with olive oil and wrap in aluminum foil.
- Roast for 30-40 minutes until soft and golden brown.
- Cool slightly, then squeeze roasted cloves into a bowl and mash until smooth.
- In a separate bowl, mix mashed garlic with mayonnaise, lemon juice, and Dijon mustard. Season with salt and pepper.
- Garnish with chopped herbs if desired.
- Chill for at least 30 minutes before serving to enhance flavors.
- Prep Time: 15 minutes
- Cook Time: 40 minutes
- Category: Condiment
- Method: Baking
- Cuisine: American
Nutrition
- Serving Size: 30g
- Calories: 100
- Sugar: 0g
- Sodium: 150mg
- Fat: 10g
- Saturated Fat: 1g
- Unsaturated Fat: 9g
- Trans Fat: 0g
- Carbohydrates: 1g
- Fiber: 0g
- Protein: 0g
- Cholesterol: 5mg
Keywords: Use fresh garlic for the best flavor. Adjust consistency by adding more lemon juice or olive oil if needed. Letting aioli rest in the fridge allows flavors to meld beautifully.